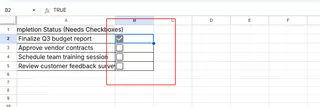
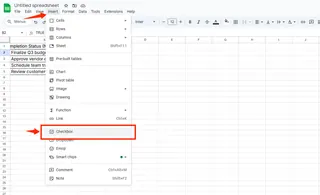
Let's be real - typing "yes" or "no" over and over in Excel gets old fast. There's a smarter way to handle binary choices that'll make your spreadsheets look cleaner and work better. Enter: the humble checkbox.
As a growth manager at Excelmatic, I've seen how small tweaks like this can transform clunky spreadsheets into smooth, professional tools. Whether you're tracking project tasks, managing inventory, or collecting survey responses, checkboxes can be game-changers.
Why Checkboxes Beat Manual Entry Every Time
Checkboxes aren't just about looking pretty (though they do). They solve real problems:
- Fewer typos: No more "yess" or "noo" slipping into your data
- Instant visual feedback: See completed items at a glance
- Better mobile experience: Easier to tap than type on small screens
- Automation potential: Link checkboxes to formulas and conditional formatting
At Excelmatic, we use checkboxes all the time for everything from feature request tracking to customer onboarding checklists. Once you start using them, you'll wonder how you ever worked without them.
Adding Your First Checkbox (It's Easier Than You Think)
Here's the quick and dirty guide to getting started:
Unlock the Developer tab (it's hidden by default):
- File > Options > Customize Ribbon
- Check the "Developer" box
Insert your checkbox:
- Go to Developer > Insert > Form Controls
- Click the checkbox icon
- Click where you want it in your sheet


Pro tip: If you're using Excelmatic, you can skip these steps entirely - our AI can add checkboxes automatically based on your data structure.
Making Checkboxes Actually Useful
A standalone checkbox is cute, but the real magic happens when you connect it to other cells:
- Right-click your checkbox > Format Control
- In the "Cell link" field, select a cell to store the TRUE/FALSE value
- Now you can reference this cell in formulas!
Example: Want to count how many tasks are done?
=COUNTIF(C2:C10, TRUE) // Counts checked boxes
Level Up with Conditional Formatting
Take your checkboxes from functional to fabulous with some visual flair:
- Select your data range
- Home > Conditional Formatting > New Rule
- Use formula:
=$C2=TRUE(assuming C is your linked column) - Set your preferred formatting (gray out completed rows? Green highlights?)
This is where Excelmatic really shines - our platform suggests smart formatting rules based on your data patterns, so you don't have to figure it out manually.
Pro Tips from the Excelmatic Team
After implementing checkboxes for hundreds of users, here's what we've learned:
- Name your checkboxes: Double-click the text to rename from "Check Box 1" to something meaningful
- Resize carefully: Hold ALT while dragging to snap to cell borders
- Protect your setup: Right-click > Format Control > Locked to prevent accidental changes
- For long lists: Use Excelmatic's bulk operations to add/format multiple checkboxes at once
When Checkboxes Aren't the Answer
As much as we love them, checkboxes aren't always the best choice:
✅ Great for: Binary choices, task lists, simple approvals
❌ Not ideal for: Multiple-choice options, detailed responses
For more complex scenarios, consider Excelmatic's smart forms or dropdown menus that adapt based on previous answers.
The Future of Data Entry
While manual checkboxes are helpful, the real productivity boost comes from automation. With Excelmatic:
- Our AI suggests where checkboxes would be most effective
- You can convert existing "yes/no" columns to checkboxes with one click
- Checkbox states sync across your entire workflow
No more wasting time on setup - just focus on what matters. Ready to upgrade your Excel game? Try Excelmatic free today and see how much time you can save.
Remember: Great spreadsheets aren't about fancy formulas - they're about creating intuitive interfaces that make data entry effortless. Checkboxes are one small step toward that goal. What will you build with them?


