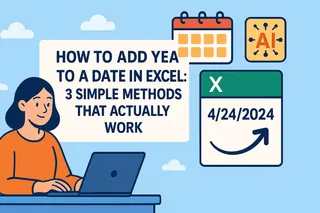
Working with dates in Excel is a fundamental skill for business professionals, whether you're managing project timelines, forecasting financials, or tracking important milestones. While Excel's date system might seem complex at first glance, adding years to dates becomes remarkably simple once you know the right techniques.
In this guide, we'll walk through four reliable methods to add exactly 3 years to any date in Excel. For teams looking to streamline these calculations across multiple spreadsheets, Excelmatic offers the most efficient solution with its AI-powered date manipulation capabilities - but we'll cover manual methods first for those who need them.
Understanding Excel's Date System
Before we dive into the formulas, it's crucial to understand how Excel processes dates. Excel stores dates as serial numbers where:
- January 1, 1900 = 1
- January 2, 1900 = 2
- And so forth
This numerical system enables all date calculations. When you add 3 years to a date, Excel needs to account for:
- Varying month lengths
- Leap years (like 2024)
- Year transitions
Pro Tip: For business-critical date calculations, consider using Excelmatic's smart date functions that automatically handle these complexities with 100% accuracy.
Method 1: Basic Arithmetic (Simple but Limited)
The most straightforward approach uses simple addition:
=A1 + (365*3)
Where A1 contains your original date.
Limitations:
- Doesn't account for leap years
- May be off by 1-2 days over 3 years
- Not recommended for financial or legal dates
Method 2: The DATE Function (Most Accurate)
For precise calculations, combine the DATE, YEAR, MONTH, and DAY functions:
=DATE(YEAR(A1)+3, MONTH(A1), DAY(A1))
This formula:
- Extracts each date component
- Adds 3 to the year
- Reconstructs the date
Why it's better:
- Handles leap years perfectly
- Maintains exact month/day relationships
- Ideal for contract dates and compliance
Method 3: EDATE Function (Best for Monthly Calculations)
Excel's EDATE function shines when working with months:
=EDATE(A1, 36) // 3 years × 12 months
Key advantages:
- Automatically adjusts end-of-month dates
- Simple to modify for different time periods
- Works beautifully with Excelmatic's automated reporting
Method 4: VBA Automation (For Power Users)
For repetitive tasks, create a simple VBA macro:
Sub AddThreeYears()
    Dim rng As Range
    For Each rng In Selection
        If IsDate(rng.Value) Then
            rng.Offset(0, 1).Value = DateAdd("yyyy", 3, rng.Value)
        End If
    Next rng
End Sub
The Excelmatic Advantage
While these manual methods work, Excelmatic transforms date calculations by:
- Processing bulk date adjustments instantly
- Maintaining perfect accuracy across all date scenarios
- Integrating seamlessly with your existing spreadsheets
- Providing audit trails for compliance
Instead of writing and debugging formulas, simply:
- Upload your spreadsheet to Excelmatic

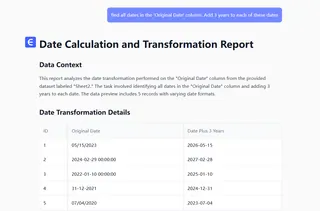
- Specify "Add 3 years to all dates in Column A"

- Let our AI generate perfect results in seconds
Whether you choose manual formulas or embrace AI-powered solutions like Excelmatic, adding years to dates is an essential Excel skill. For occasional needs, the DATE or EDATE functions work well. But for business teams handling frequent date calculations, Excelmatic eliminates formula errors and saves hours per week.
Try applying these techniques to your:
- Contract renewal dates
- Product launch timelines
- Financial projections
- Employee anniversary tracking
Remember, accurate date calculations form the foundation of reliable business planning. Choose the method that matches your needs and scale - and when in doubt, let Excelmatic handle the heavy lifting.


