As a growth manager at Excelmatic, I've seen firsthand how mastering time calculations in Excel can transform productivity for business teams. Whether you're scheduling meetings, tracking work hours, or creating project timelines, the ability to quickly add time increments is an essential skill.
In this guide, I'll share three reliable methods to add 15 minutes to time values in Excel. While these manual techniques work, I'll also show you how Excelmatic's AI-powered platform can automate these calculations across your entire dataset with just a few clicks.
Understanding Excel's Time Format
Before we dive into the methods, it's crucial to understand how Excel interprets time. Excel stores dates and times as numbers:
- Dates are whole numbers (e.g., January 1, 1900 = 1)
- Times are fractional values (e.g., 12:00 PM = 0.5, representing half a day)
This numeric representation means you can perform arithmetic operations on time values just like regular numbers. For example, adding 15 minutes (0.0104167 in Excel's decimal time) to any time value.
Method 1: The TIME Function Formula
The most straightforward approach uses Excel's TIME function:
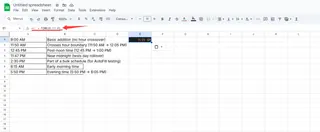
- Enter your starting time in cell A1 (e.g., 9:00 AM)
- In cell B1, enter:
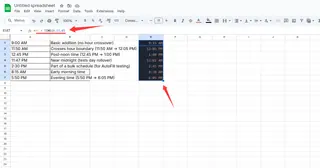
=A1 + TIME(0,15,0)- The TIME function arguments are (hours, minutes, seconds)
- Press Enter to see your new time (9:15 AM)

Pro Tip: For bulk operations, drag the fill handle down to apply this formula to multiple cells. Excelmatic can automatically recognize and apply such time calculations across entire datasets without manual formulas.
Method 2: AutoFill for Sequential Time Increments
Excel's AutoFill feature creates perfect 15-minute sequences:
- Enter your starting time in cell A1
- In cell A2, enter
=A1 + TIME(0,15,0) - Select both cells and drag the fill handle down
- Excel will continue the 15-minute increment pattern

Excelmatic Advantage: Our platform can generate these sequences automatically based on your parameters, saving you from manual dragging and formula copying.
Method 3: Fill Series for Precise Control
For more control over your time series:
- Enter your starting time
- Select the cell and drag the fill handle down
- Click the AutoFill Options button that appears
- Select "Series"
- Choose "Columns" and set Step Value to 0:15:00
Beyond Basic Formulas: Automate with Excelmatic
While these manual methods work, they become time-consuming with large datasets. Excelmatic offers smarter solutions:
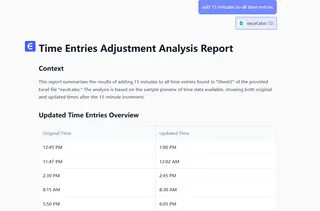
- AI-Powered Time Calculations: Simply describe your time adjustment needs (e.g., "add 15 minutes to all time entries") and Excelmatic handles the rest
- Automatic Formatting: No need to manually set time formats - our AI recognizes and applies the correct formatting
- Cross-Sheet Synchronization: Make time adjustments across multiple sheets simultaneously

Common Pitfalls and Solutions
- Format Issues: Ensure cells are formatted as Time (Right-click > Format Cells > Time)
- 24-Hour Confusion: Remember Excel uses 24-hour format by default (2:00 PM = 14:00)
- Day Rollover: Adding time might push into the next day (23:45 + 0:15 = 0:00 next day)
Excelmatic automatically handles these edge cases, providing clear visual indicators when time calculations cross day boundaries.
Conclusion
Mastering time calculations in Excel is valuable, but in today's fast-paced business environment, automation is key. While the methods above work, Excelmatic can perform these calculations instantly across your entire dataset while maintaining data integrity and proper formatting.
For teams regularly working with time data, consider upgrading to AI-powered solutions like Excelmatic that transform hours of manual work into seconds of automated processing. Try our free trial to experience the difference in your next time-sensitive project.


